Slumber parties.

Their first night in the ground always leaves me apprehensive. Lone beacons of fresh greens in an open plain. The earth is awakening and there are empty bellies roaming.

Their pot homes become cloches. Their new beds make up an anchor for their hats. Sleep well, little starts.

Until the morning…

Now where to plant the 18 or so tomatoes still in pots…

Advertisement

7-11 tomatoes.

They used to be saved Sonic cups. Then we stopped going to Sonic.

They used to not pot up larger than my hoard of 4″ pots. Then we didn’t harvest much.

Last year, I ventured into the nearby 7-11 to buy 24 Big Gulp cups. $2/sleeve and I was set. Then my one baby wrecking crew prevented saving them to this year.

Today:

“Hi, I’d like to buy a sleeve of big gulp cups, please.

– Um. Let me get the woman who can help you…

(It’s the same woman!)

“Oh, hi! We did this last spring, too. I’d like to buy a sleeve of big gulp cups, please. Actually… two sleeves this year.”

First Woman – Can I ask what you do with these?

” I pot up my tomatoes.”

Second Woman – They’re on the house this year. Be sure you bring any extra tomatoes this way. There’s a donation jar for the food bank down the counter if you’re so inclined.

“Will do!”

They were overdue and hungry, hence the yellow here and there. Maybe ten more days, maybe three weeks. Then they’ll be potted up to their necks for the third and final time, getting their roots a good 12-18″ deep to weather our hot, dry summers for a second harvest come fall.

August, nearly gone.

Things I find hard to believe these days:
– August is nearly over
– How mild this summer has been
– How envious (and grateful) I am of (for) other people’s gardens and the fact that they share
– What starting from scratch looks like with this much space

I’m sorry, summer is almost over? When did that happen? And what kind of “summer” has this been for Texas, you ask? A ridiculously mild one. Here’s a graphic from last year around mid-July.
100degrees
Keep in mind, that was mid-August, and by the end of the summer in 2011, we had had a stretch of 100 or more degrees that lasted 27 days, with a total of 90 days over 100 degrees that year.
By the same time in July this year? Zero 100 degree days. It was glorious.

Other people’s gardens (and farms) have been keeping us in delicious squash, peppers, tomatoes, melon, peaches, greens, beets, and various other goodies…like blackberries.
DSC_0065

And so the planning begins in earnest. Trying to recall through the fog left behind by our adorable sleep thief which fall veggies to sow when and wondering if I can push things around to fit into the timeline of still needing to actually build the beds. I pull out my fall garden seeds to see what I want to sow this year. Of course the answer is “all of them.” We’ll see how that goes. Also, I don’t think I can justify buying any fall garden seeds this year…
DSC_0234

But I can read through one of my favorite gardening books while I plan how to maximize space, balanced with aesthetics, keeping in mind that a 5′ wide bed was wider than I could reach to the center of at the last house.
DSC_0236

And try and make it to the library for a book on monarch gardening (unless one of you clever folks knows of a useful website on the topic?) After listening to a piece on the radio about their continued decline due to Round Up (and other chemical) usage on GMO crops in the Midwest taking out their larval food, I’m reminded that not only do I want food for the bees, but for the butterflies as well. I’ve seen a tiger swallow tail or two, and we have about 25 resident dragon flies practicing maneuvers each evening in the backyard, but no Monarchs. We’re in their migratory flight path, and every species I know of likes road trip food. Just because they can’t knock on my door and ask for food doesn’t mean I shouldn’t feed them.

Hopefully there will be some “breaking ground” posts in the next month or so. In the meantime, thanks for keeping up on your own blogs to keep me excited for y’all and inspired for the work to come.

DH has been busy(/ier)

A bit ago, a house in our neighborhood got a new deck. Their old deck wasn’t so old, and yet was left completely disassembled on the curb for pick-up. Well, DH didn’t mind lending a hand to the collection crew that week and picked it up.

What does one do with old decking? Apparently, so many things.

Work station
You set up a work station in the beautiful weather.

Wire
You might even unmake my unsightly “compost bin” (also known as “that ring of fencing in the middle of the backyard held in place by two stumps.”) No worries. I can reuse the fencing as trellis later in the season.

Compost bin
And make a more incognito one…

Composting
And even turn the compost, fill the bin, water it, and top it with leaves!

I often say aloud in the real world how very lucky and spoiled I am, and I do mean it. In so many ways, I am spoiled rotten and ever so grateful for DH.

And then, he keeps going…
New garden bed

And going!
Second new garden bed

A new compost bin and two new garden beds…I am even more excited for spring than I was before. Especially since his construction came out a lot sturdier (and more square) than my lasagna bed I built. Now if only I could decide where to put the new beds, or if I’d remembered to bring home some cardboard…

Tools Needed:
Box of screws
Free decking
Saw
Drill
Measuring tape

Making space

In February of 2011, I cleared out my 100 square foot garden. I ripped the grass, dug three feet down removing weed seeds, grass roots, and June bug larvae. DH built the edging to keep the crawling St. Augustine and Bermuda at bay, anchoring the edging with posts with which to anchor shade cloth and bean string.

In January of 2012, I rented two plots in the local community garden. My 100 square feet in which to garden jumped to 500 over night. By May of this year, I realized that community gardening, or at least gardening with that community, wasn’t for me.

Even with my stark lack of gardening this year so far, dropping from 500 square feet back to 100 was a bit of a blow. So what’s one to do? Whine and lament the attitudes and personalities of those who made it necessary to leave the extra 400 square feet behind? Nah. That doesn’t solve anything. Unless there’s a complaint quota necessary for being human that I don’t know about…it would solve that.

One makes space.

Shannon over at Dirt ‘n Kids has shared her success with a similar climate to mine using Lasagna Gardening. August is not the time to be digging 36″ down through clay and pebbles to make a new bed. I wanted to grow more seedlings of self-saved broccoli seeds (Green Early Heirloom) and Amazing Cauliflower. I wanted to try my hand at some Ruby Moon Hyacinth Beans and Sugar Ann peas. And then…you get the idea.

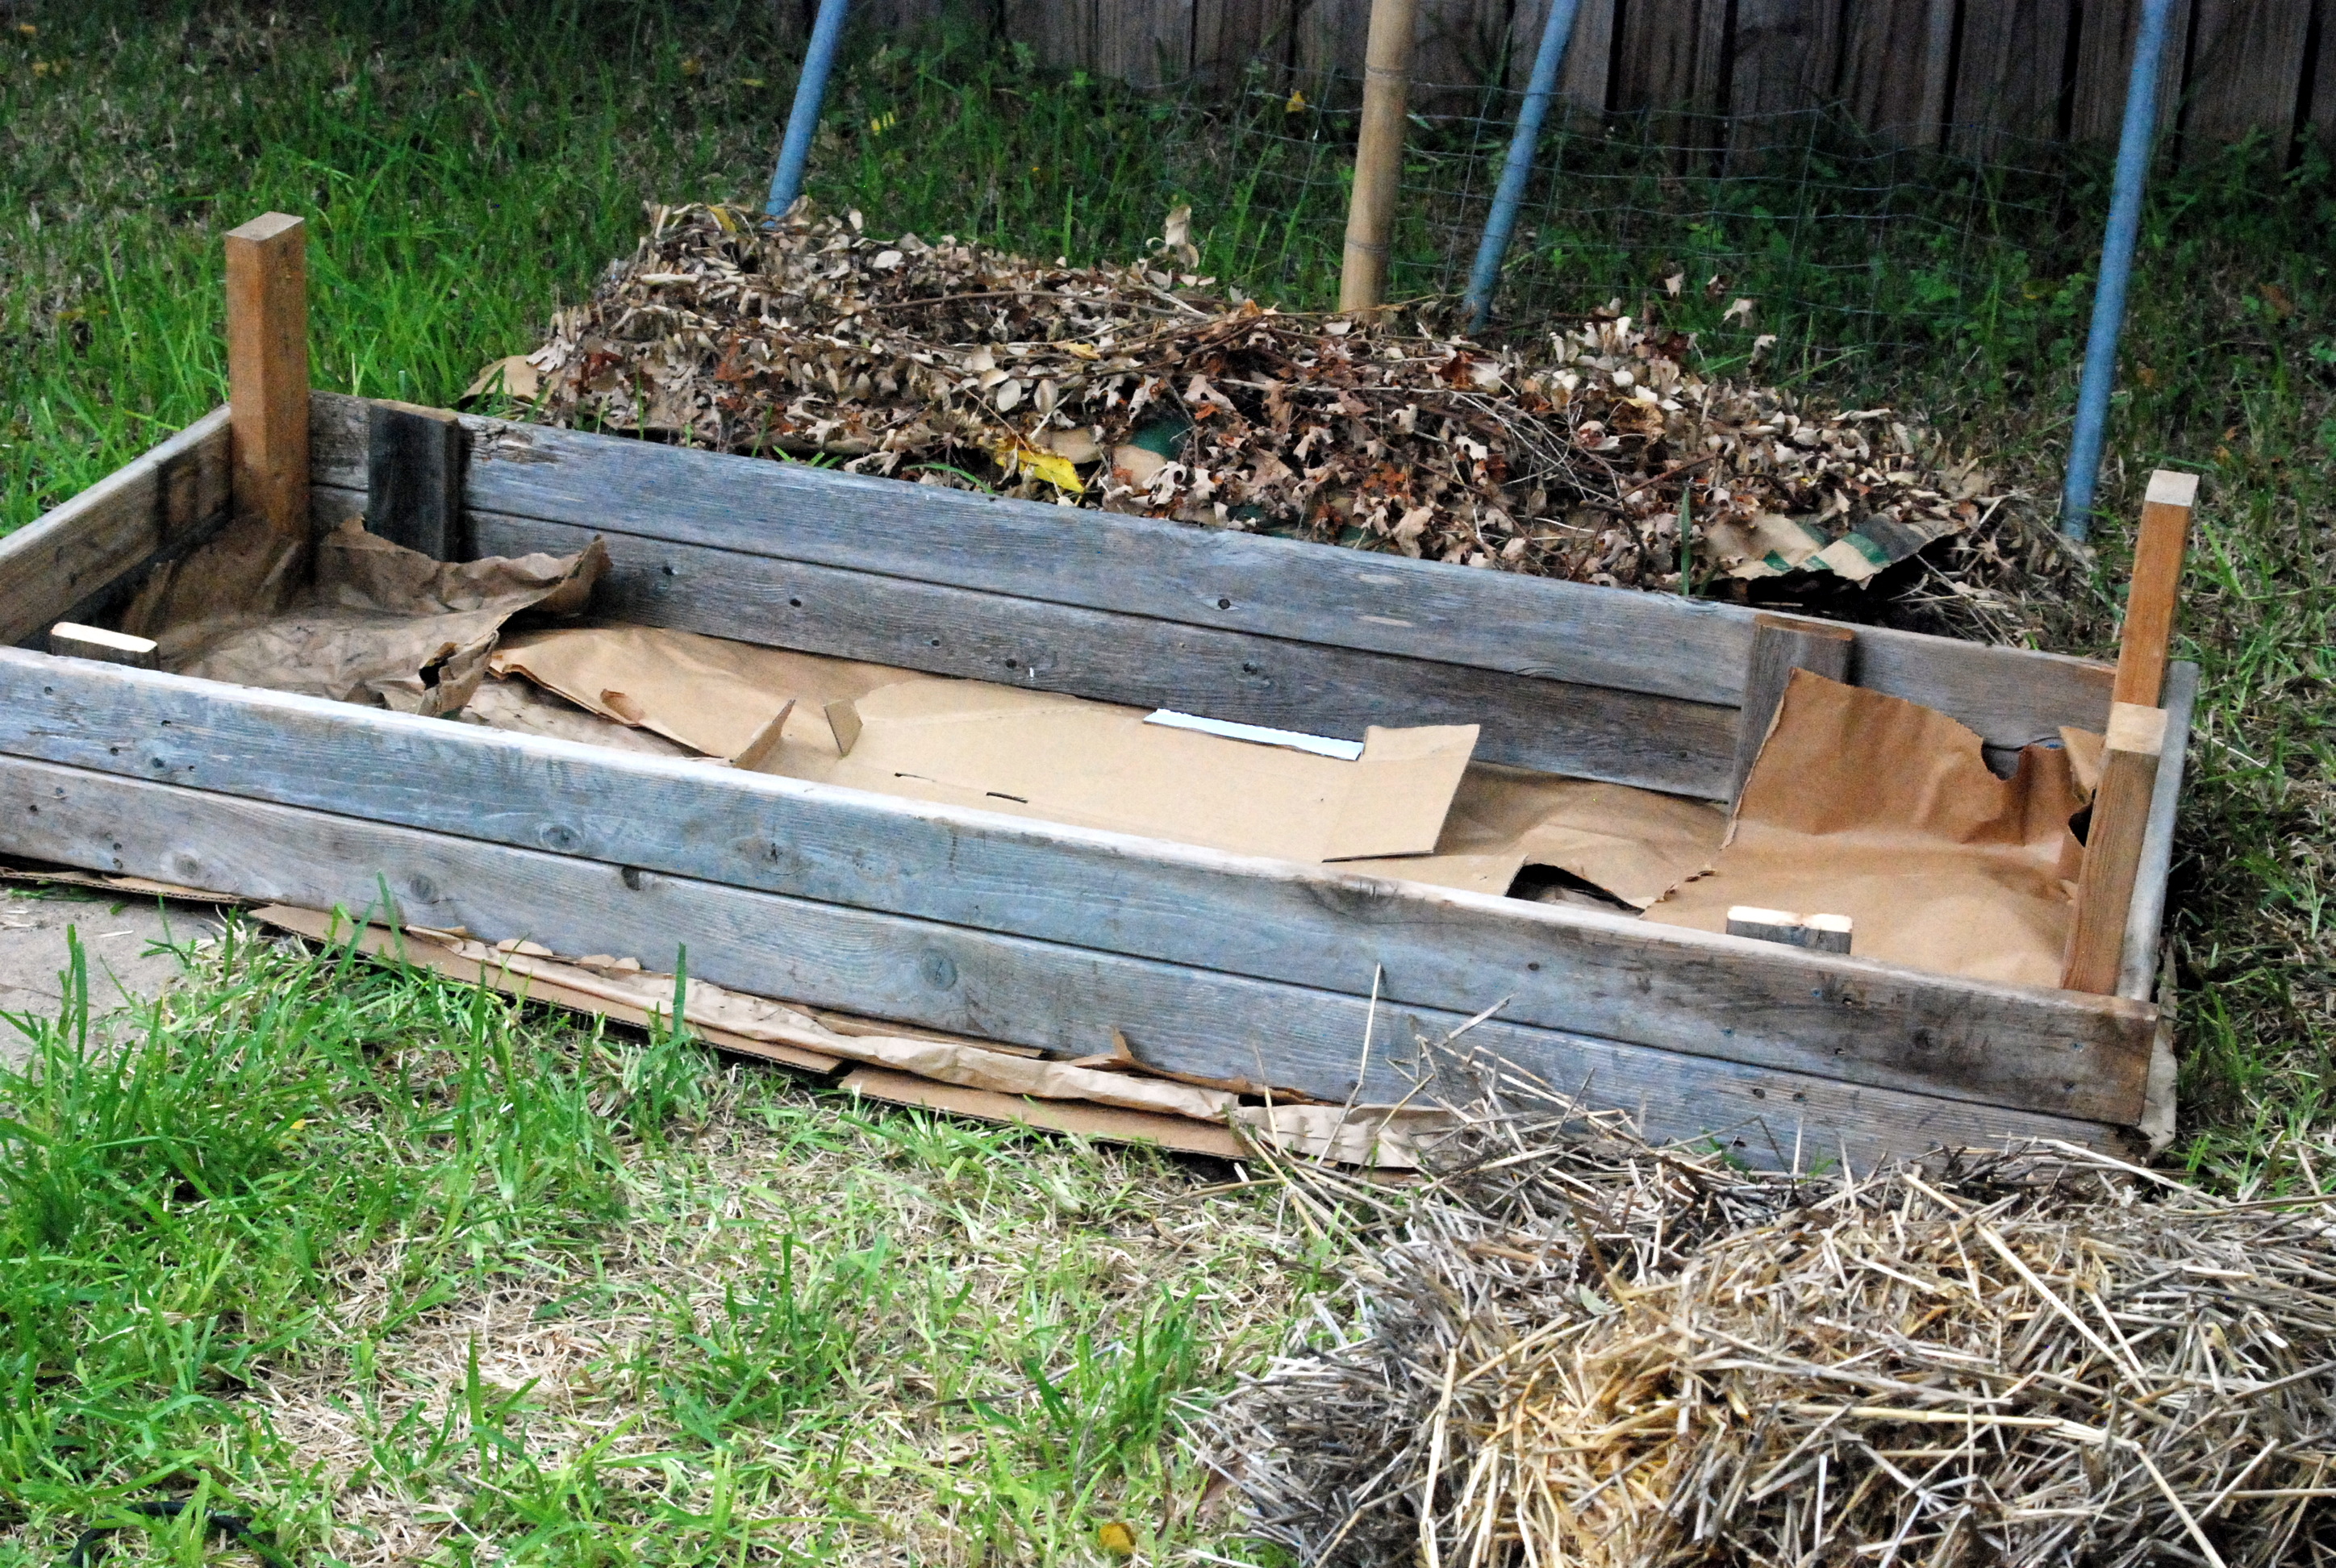
I dug in the garage for a box. I must’ve had this same urge ages ago when I first stumbled upon Shannon’s blog, because there was a large cardboard box containing untreated brown packing paper, a neighbor’s discarded leaf bag, and smaller segments of lesser-chemical-ed cardboard eagerly awaiting the day.

I needed boards and screws. DH had gathered a neighbor’s discarded decking for my compost bin and had some extra pieces. I found some excess ends of 2″x4″‘s left over from his saw-horse project. Exterior screws were shelved beside the drywall screws, eye hooks, and other fasteners. I had to choose – 1″ 1/4″ dry wall screws or 4″ exterior screws. I knew the 1″ 1/4″ were too short to bite in properly, and may not weather the outdoors very well. I grabbed the 4″ exterior screws.

I didn’t feel like measuring. So many things in life must be weighed and measured, exact and equal. I find gardening to be good practice for my (slightly obsessive) need for accuracy and organization to let go and see that the world doesn’t collapse. The earth and the bugs and the microbes know infinitely more about what they’re doing than I do. The practice of letting them do what they do is soothing in a culture that glorifies busy-ness and demands constant multi-tasking.

I made thicker sides by putting two boards together, locking them in place with cross boards. The 2″x4″s were to serve as the corner anchors. I started the assembly…and learned that while too-short screws don’t work well, neither do too-long screws. I didn’t mind that they stuck out. I rationalized the tops would be great places to lash string ends. What I didn’t know was that a too-long screw won’t pull two boards together, it will leave them with a gap. Frustration set in. I went inside and was done for the day.

Letting the frustration go, armed with my new knowledge, I picked up a box of 2″ exterior screws and went about the business of removing a 4″ screw, replacing it with a 2″ screw, and repeating my way around the box. The boards cinched together and the box was square. I dug four quick holes to sink the corner posts into the earth. One full of pebbles, one blocked by a concrete over-pour, the other two easy. The bed lowered into place, it was ready for soil-making magic.

DSC_0001

I had already saved up some trimmings and egg cartons, some hay and compost. I’d even saved it in layers (you can see it behind the bed frame.) It was as simple as cutting loose a strip of layered goodies, carefully lifting it off the ground, and nestling it in the wooden frame.
DSC_0002

So I’m not sure how much square footage I gained. I’m ok with that. I’m also ok with the fact that the stump of the maple tree we had to cut down in the front yard has finally bit the dust. Giant sponges of carbon to start the fungal map off right made themselves available the very evening I needed them. The creation of a suburban forest floor.

I put up the drill and the skill saw. I wrapped and tied the extension cord. The shovel and buckets in hand, it was time to go in. DH had made some grass-fed burger patties and Cinderella squash discs on the grill.

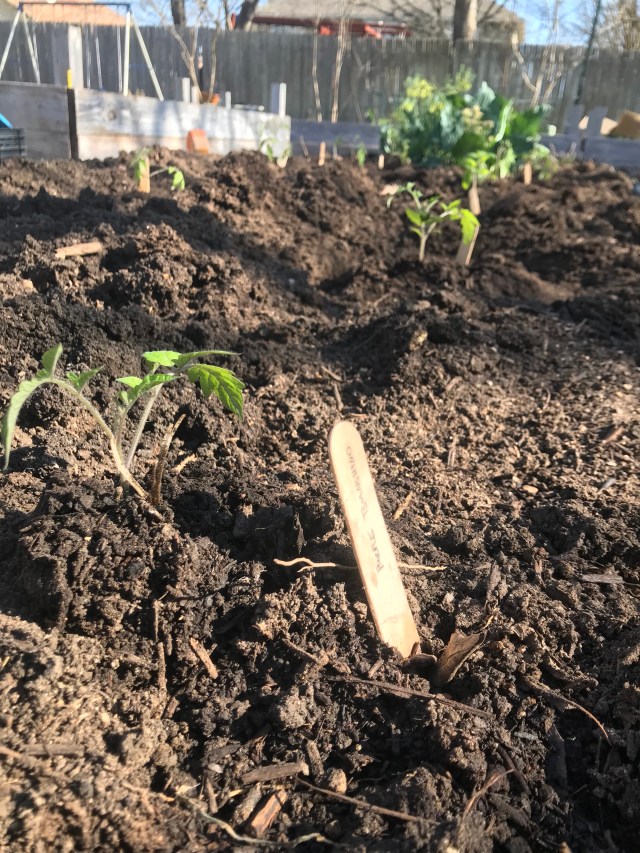
And there it was. A forgotten carrot lost beneath the returning basil offering up spring’s sowings.
DSC_0004

Nervous…

I sowed squash indoors weeks ago. They bloomed the other day. The Books say it’s ok to plant squash now. The Books are often wrong.

The Books reference zones based on frost dates. Based on frost dates, I should be able to grow anything grown along the valley of the West Coast of the United States. This is not actual truth.

What The Books fail to account for in their Zone System is temperature, and daylight, and precipitation. I can grow many things all winter that would not survive in other areas of the same zone. Why?

Well, for starters, it’s still hitting 100 degrees fahrenheit regularly here in my version of Zone 8a/b. In other areas of Zone 8a/b there are highs in the 70s. They are also dropping into the 49ers at night. Me? Maybe as low as 75 if I’m lucky. My tomatoes are barely alive (mostly due to my frugal watering) while theirs are done (due to their chilly nights.)

Next we have the concept of chill hours. Peaches grow beautifully and plentifully 90 minutes west of here, having just enough chill to fruit. Citrus grow outdoors three hours southeast of here, with the lightest of frosts being the rarest of things. Neither would be happy here.

As for daylight, the fluctuation is just as wide. Summer in Seattle as a child taught me how greatly the curve of the globe changes the daylight in rotation to the sun. The sun sets in June at nearly 11pm. We top out at just after 9pm. Winters in Olympia were miserable for me with the sun setting at 4:30pm. We don’t really set before 6pm.

Never mind the other oh-so-important water. Days with rain here? Maybe a third of the number of days up there. There are irrigation options, but that costs money and doesn’t change the surrounding soil so much.

And not that the Zones claim to say anything about soil, but clay is not clay is not clay. I’ll save that for another day.

So today, I put eight seedlings of squash out. I’m nervous. I held eight back. The Books also say I can sow beets and put out my cauliflower and broccoli starts. I won’t be listening to them on those counts just yet.

And just for fun, some pretty clouds.

image

The last two hours of light.

I’ve never so enjoyed two hours of pulling weeds. With our dog on a longer rope to wag his way to greet any wandering garden neighbors, my big floppy new garden hat, and my mud-stained leather gloves, I squatted in the garden and pulled weed after rooted weed and lobbed it at the stone wall. The sprawling kind with the fragile arms. The tall ones with the white pillar flowers. The ones like those, but deep purple. The ivy. The frilly crawling ones. One after another, the hit the wall and fell to the earth. Soon there was a spongy bed of pulled weeds along the wall and a clear patch of earth between the peppers and sweet potatoes where for months there had been a growing bed of foliage.

Now the fish peppers are free to stretch their stripey fruit and variegated leaves toward the sweet potatoes.

And the sweet potatoes, they have a bit of a head start on the reaching-toward-the-peppers…

With the weeds gone, I marched to the tool hut for a shovel and wheelbarrow. Our gardens are supplied with a regular pile of mulch that composts nicely. The hut was sans shovel. It was then that I remembered the hut had been sans shovel for months. That’s ok. I’d learned last time that a wheelbarrow tilted just-so with a hoe to pull the mulch worked as well as I needed.

I tilted the wheelbarrow just-so. I pulled the mulch into it. Tilted it level. Backed it up off the mound and…nada. The wheelbarrow wouldn’t move. Perhaps I was in a hole? Check…nope. No hole. A completely flat tire? Yeah, one of those.

I went looking in the tool hut. There were two new contraptions. They’re like buckets, with tall backs like chairs, that have handles in the back and wheels on the front. Handbarrow? Not sure of the actual name, but it would have to do the trick. It worked surprisingly well! It only held about half of a wheelbarrow’s worth at a time, but was easier on my shoulders than a wheelbarrow. I don’t think it would work outside of a well tended path area, but for a place such as our gardens, it seems kind of perfect.

I hadn’t planned on watering, but with the triple digit heat before this “cool spell” and more heat expected, I figured the last hoorah of tomatoes could use the extra juice.

The tomatoes are definitely slowing down on production in this heat. Last year production didn’t make it until July, and this year the later heat and additional rainfall (additional? I mean the fact that there was rainfall at all) has them still going for at least the next week or two.

As much as they’re slowing down in production, they’re still growing. The camera is sitting on the top of a T-post, five feet tall.

They’re getting taller. Last summer my Cherry Chadwick vines were 15 feet long by the time the first frost hit in November. As they get taller, they point out the weaknesses in my trellising plan. These aren’t the tallest vines, they’re just the ones that have yet to fallen over. The others have all fallen over. They don’t fall sideways, because of the twine. They instead fall down the line, between the lengths of twine. This keeps the picking areas as clear as they have been, but it creates such a deeply thick jungle of vines and leaves, that the fruit is hidden from view. A little tomato hide and seek.

I know the Cherry Chadwicks, and the Black Princes will make it through the summer with careful water management and send a second harvest into the world after the heat of the summer has passed. I am excited to see if any other varieties do the same.

Do you save seeds?

Which ones?

I try and save seeds when I can. I read a few books on seed saving. I read a few articles, blogs, and pamphlets on seed saving. The verdict? Holy cow, are there a lot of “rules” for seed saving!

As much as I am a fan of rules sometimes (logic is fun!) other times, I’m perfectly content to find my bliss outside the lines.

Some seeds are super easy to save. Lettuce is one of them. I often lose track of my lettuce. I’ll eat it, and eat it, and it’ll grow back again and again. Until at some point I either need a break from lettuce wraps and salads, or the elements conspire for lettuce growth, and before I know it, my lettuce has bolted a few feet in the air. At that point, I know (from experience) that it won’t taste that good. Pull it up? Make room for something else? Sometimes.

This year, having lucked out with acquiring 400 square feet of allotment in a community area, I’m experimenting with a long time goal of mine – a volunteer garden. Last fall, a few lettuce varieties volunteered in my lawn. I transplanted them into the garden after taking down the tomato forest. They reached about five feet tall before the flowers began to appear. About two minutes, a paper bag, and a pair of clippers results in more romaine seeds than I will possibly need.

Wild flower seeds are also super easy to save!

The “bouquet” in the back is made of the seed heads left behind by spent Blanketflowers. The jar on the left has Cone Flower Heads drying slowly. The center jar has the interesting pods left behind by Love in A Mist. On the right? Cilantro seeds, aka coriander.

Sometimes, “seed saving” is more of a harvest for our bellies than it is for the purpose of growing more plants. For instance – beans!

This is the main harvest of soup beans for the spring beds. Half Tiger Beans, and half Yin Yang Beans. It’s so nice to sit inside on a hot afternoon, grabbing some lunch and shelling beans. The dried bean casings make for good “brown stuff” for the compost, too!

I do save beans for the next season’s plantings as well, and I don’t save any old beans either – I start to play with the genes in the most simple way possible.

If a single plant has a lot more beans than the others, I’ll save a pod or two off that plant to hopefully encourage per plant production. If a single pod has five beans inside instead of four or fewer, I’ll save those beans as well to try and encourage more beans per pod. Occasionally I’ll remember to also save some of the first beans of the year (encouraging early production) and some of the last beans of the year (encouraging heat survival.)

For instance, Yin Yang Beans most commonly have 3-4 beans per pod. This guy got to have his seeds saved for planting (instead of for eating.)

Not all seed saving attempts are successful. Most recently I tried to save seeds from a Farmer’s Market Patty Pan Squash. I scooped out the seeds, soaked them in water for a day or two, strained the goo from the seeds, and spread them on a paper towel to dry. When they had dried completely, it was clear that none of the seeds had had a chance to mature properly in the flesh, and wouldn’t be viable. I bought three more of the same patty pan squash this morning at the market to try my luck again. If I strike out a second time, I’ll simply break down and purchase the seeds I want. Then, when they’re growing in my garden, I’ll leave a squash on each plant to over-ripen so the seeds have a chance next year.

Other reasons not all seed saving ventures work out? Those “rules” the books and articles talk about. Beans are easy because they mostly self-pollinate. Other plants are friendlier with other varieties of the same type of plant. If you saved the seeds of cantaloupes planted next to cucumbers, you may not like what grows the next year! So the rules can be important, if you’re picky about the offspring being true to type, or if you want to make sure your snozzberries taste like snozzberries (which is important to do sometimes!)

Structure.

I like to play with structure. Build forts. Rope ladders. Tree houses. Box caves. I think so many wondrous things fall by the wayside on the wander into adulthood that sometimes as adults we may be just as boring as our childselves would say we were.

I find that there a few tried-and-true cures for such mature doldrums:

  • Sprinklers (even more so with four footed friends or the squeals of toddlers that belong to someone else.)
  • The consequent mud from said sprinklers.
  • Wrapping paper tubes (fort supports, light sabers, ski poles, I could go on…)
  • The ever sought and ever rare refrigerator box.
  • Sticks.

Perhaps by chance, or perhaps through purpose, my garden time tends to incorporate a lot of the same material. Sprinklers are a given. Mud – also a given. Wrapping paper tubes? I’ve heard that if you cut them (or toilet paper or paper towel tubes) into one inch rings and place them around seedlings, they help combat pests. (I have yet to confirm this, how about you?)

The fridge box: I’m not a cardboard composter or mulcher, but others are.

Sticks! Sticks are great for small tomato stakes, pea trellising, pole beans, and likely many other things.

I’ve known for a bit that I needed some kind of structure for my tiger beans. They’ll survive, and produce, decently without structure. With structure, I’ll get to more of the beans before the bugs do, and I haven’t tested the theory but would almost swear they make more beans while climbing. The issue? I planted them in a row in the middle of a long bed. Oops. I hadn’t planned it that way. I had it drawn up differently. When the day came to sow the seeds, my mind left me so much that I neglected to even reference the plan I’d carefully graphed, and simply sowed away. So it goes.

So what was I to do? Perhaps, I postulated, I could put a forked stick at either end of the bean patch, run a cross stick from end to end, and drop lines down from the beam. Except I was fresh out of forked sticks. Teepees? I’ve never had luck with teepees.

And then I realized that at some point I had also hoped to enclose the bed. A neighbor down at the garden plots warned of the possibility of large, wandering, hungry wild game (in the form of humans) who would help themselves to the literal fruits of your literal labors. I would like to think this wouldn’t really happen, but apparently it has in the past.

DH and I tossed some ideas around. The bed at home has a nice structure that is flexible to the needs of the plants within. We didn’t really want to invest that much lumber into a top structure that would be anchored to a weak (and in places rotting) base structure provided by the community garden maintenance crew. I knew I wanted a shade cloth option, and he convinced me that we could do double duty if we hatched a plan to replace shade cloth with plastic in the winter.

And then it struck. We were wandering Home Depot, as we are known to do, halfway through a list of soil sulfur, air filters, and rope for a cat scratching post, when we found ourselves on the plumbing aisle. We were caught in a stare. We both knew at once. And we both started talking at once: “What if we did this for the garden!”

Supplies for a 20′ x 10′ bed:

  • Twelve pieces of 3/8″ thick, 12″ long (or longer), rebar ($9.00 – we would have liked to have longer rebar, but with $0.75 each for 12″ jumping to $3 each for 24″, we made do.)
  • Seven lengths of 20′ x 3/4″ PVC ($30)
  • Four pieces of twine about 18″ long (Free after using it to tie the PVC into the truck on the way home.)
  • Hammer (we already had one, so free for us. A rock would also work.)
  • Something to stand on. (We borrowed a neighboring gardener’s lawn chair.)
  • Duct tape (we already had this as well. More twine (still free) would also work.)

How:

  1. Split the length of the bed into four foot sections, starting in a corner.
  2. Dig out a small hole (maybe four inches deep) and push a piece of rebar into the soil.
  3. Hammer the rebar into the soil so the end of it is just below the edge of the bed. (About 8″ underground, 4″ above ground.)
  4. Thread the PVC end over the rebar (this gets wiggly, as it it is twenty feet long and bendy. Feel free to laugh, we did.)
  5. Bend the PVC down to thread the other end over the rebar on the opposite edge of the bed. You just made your first “rib”
  6. Like this: 
  7. Tie the PVC to the corner posts to help anchor. 
  8. Continue on down the bed, threading PVC onto the rebar that you spaced every four feet.
  9. Your “ribs” are up! 
  10. Like DH is doing on the left of this picture, press each side of each rib down into the earth to help anchor it. The bowing of the pipe should create pressure against the side boards of the bed, but pushing the tubing into the ground helps prevent lift-off.
  11. Set the chair up under the first rib, and with the seventh length of pipe running under the ribs, lash the “spine” to the “ribs” with duct tape (or twine) just enough to tack it up.
  12. Proceed down the length of the structure, tacking each rib to the spine.
  13. When you reach the other end, lash it securely, and then work your way back up the bed. This time, tighten the meeting of the two pipes and tape in a cross-cross pattern.
  14. Ta da! 

Why “ribs” and “spine”? Well, aside from looking a bit like a giant rib cage, PVC and tape were what we used to construct a whale in third grade to put on a showing of The Old Man and the Sea. That, and you knew exactly what I meant, didn’t you?

I do plan to do similarly with the Right Bed now that I see our idea in real life (and love it!) But first, we need to trellis-up those tomatoes! (Another day.) And drop lines for the beans (maybe tomorrow…)